There’s nothing quite like the flavor and aroma of fresh herbs in your favorite recipes. However, have you noticed how pricey both dried and fresh herbs at the grocery store are? Factor in the fact that the shelf life of cut fresh herbs is only a few days, and it’s hard to justify the splurge.
The good news? You can get the best of both worlds by creating your custom herb garden that is both cost-effective and fresh. Before you go thinking that growing herbs requires expertise in gardening, we’re here to tell you that it’s actually quite simple! Let’s dive into the basics first.
The Basics:
-
Herbs need plentiful sunlight, so consider growing your herb garden by a window in the kitchen or someplace that gets equally generous light exposure.
-
Choose the right herbs. Basil needs 6-8 hours of full sunlight to grow adequately, which can be quite difficult to achieve but is one of the most popular fresh ingredients in recipes. Some slightly less demanding plants include lemon balm, parsley, chives, oregano, and mint. Pro tip: The broader the leaf on the herb, the better it will do indoors.
-
Choose pots that drain well and mix in some gravel with the potting soil to encourage drainage.
-
Set a weekly reminder to fertilizer and trim your herbs.
-
Don’t oversaturate the soil with water.
How to display:
There’s no shortage of adorable herb garden DIY display guides online for every size home, but here are a few of our favorites:
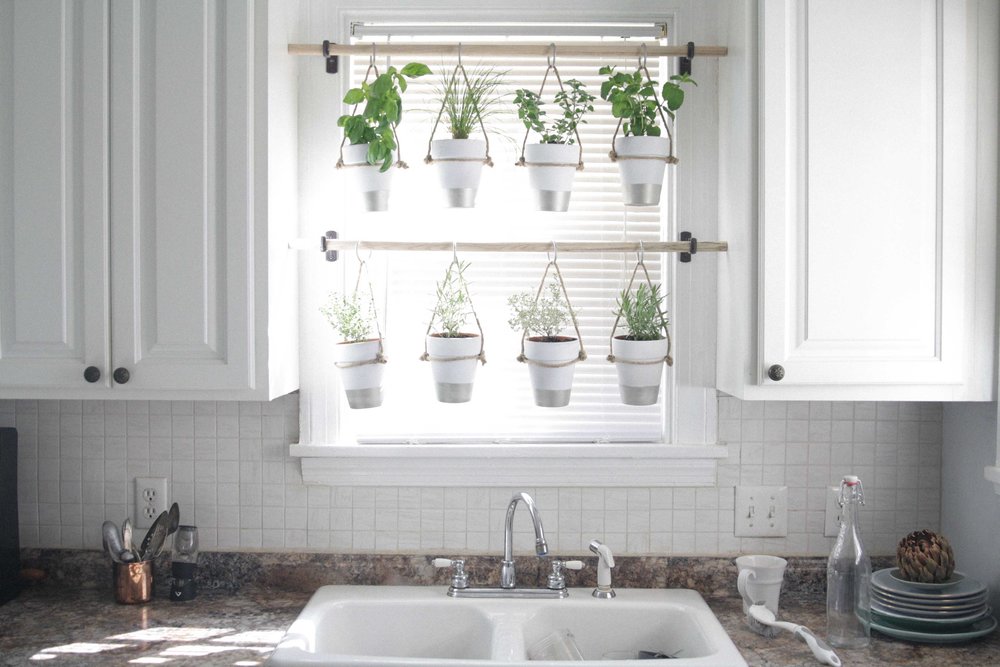
This lovely hanging window herb garden from The Bird and Her Song
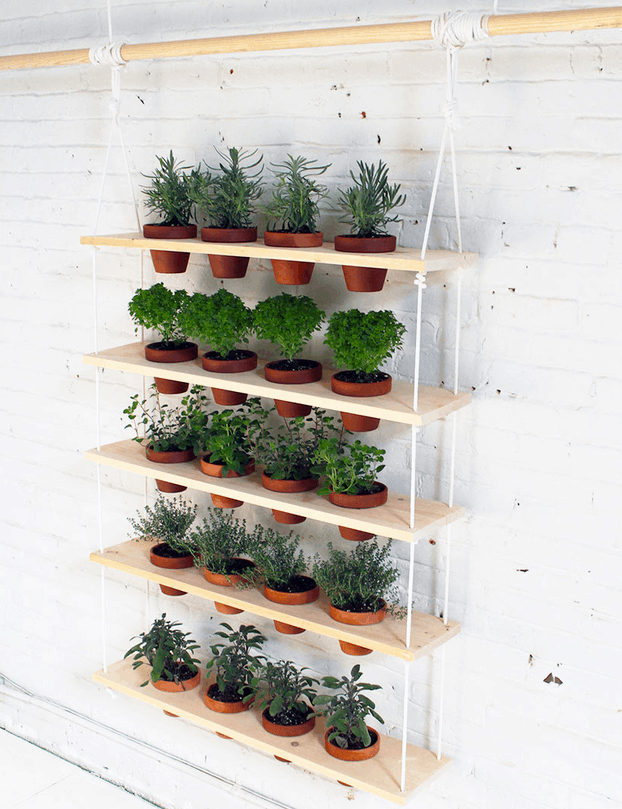
This charming hanging ladder herb garden from Homesteading
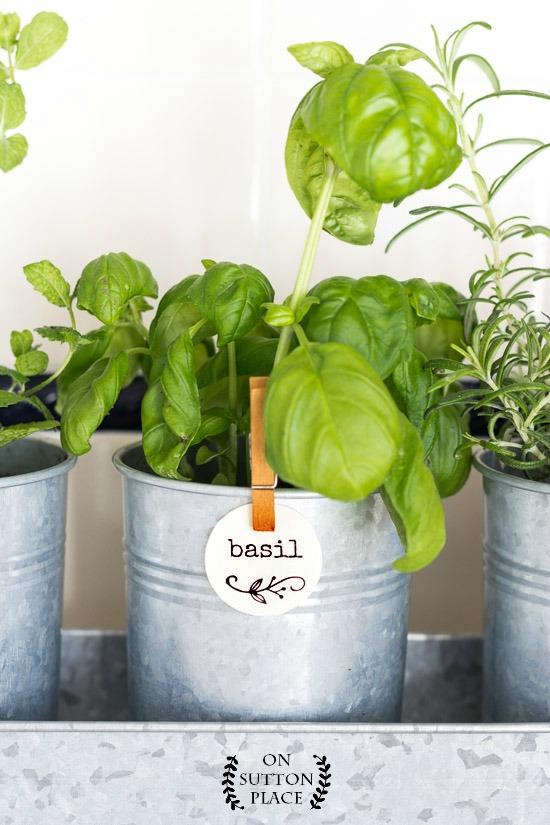
This simple but modern looking galvanized planter herb garden from On Sutton Place
Drying herbs:
Sometimes we can’t keep up with the supply of fresh herbs our garden produces. Instead of letting the leaves wilt and shrivel away, you can easily dry your herbs and continue to use for your cooking needs! Here are the two main ways to dry herbs:
Oven dry
Layer your herb leaves in a cookie sheet up to an inch deep.
Turn your oven on to it’s lowest heat setting (less than 180 degrees) and leave your sheet of herbs in the oven for two to four hours. When leaves crumble easily, you’ll know it’s time to take them out!
While this method is much faster than air drying, keep in mind that oven-dried herbs hold less flavor than air-dried herbs.
Air dry
Bundle together 5 to 10 branches and tie gently with a string or rubber band. Smaller bundles will dry faster.
Place the bundle of herbs in a small paper bag, stem side up. Tie the end of the bag closed and add a couple of holes for ventilation. The bag will catch any leaves that fall off during the drying process and help keep your delicate herbs safe from damage!
Hang the bag by the stems in a well-ventilated room.
In about a week, you’ll have a bundle of quality, homemade dried herbs!
Pro tip: Keep the dried herb leaves whole until you’re ready to use them to maintain optimal flavor.
Ready to go out and start growing your own indoor herb garden? Stop by Charleston Flower Market to find more herbs and pots to add to your herbal array!